The Power of Collaboration: Running k0s on Nomad

Collaborations are awesome. You bring a set of skills to the table, and the other person brings another set of skills to the table. I’ve been lucky to collaborate with great folks and organizations over the past year, like Tracetest in February and in June, and Syntasso in April. In my latest fun and exciting collaboration has me finding new and exciting things to deploy to Nomad.
The Challenge
The latest Nomad problem I chose to tackle is perhaps the weirdest tech problem that I’ve ever tackled: running Kubernetes on HashiCorp Nomad. When I first embarked on this challenge, I messaged my friend Luiz Aoqui, a fellow Brazilian living in Toronto who was a guest in Season 1 of my On-Call Me Maybe Podcast aaaaand happens to work at HashiCorp as a developer on the Nomad team. His reaction? Enthusiasm and perhaps a little curiosity, and most of all, he said that he would be happy to collaborate on this! Giddyup!
First things first. You’re probably wondering what on earth possessed me to do that. Fair question. The answer is that I thought it would be an interesting and relatively straightforward problem to solve.
Hold up. Yup. I said I thought that it would be relatively straightforward to solve. Clearly the Tech Gods laughed in my face at that one, eh?
Now, I’m not completely masochistic (maybe?), so I opted to not try to containerize Kubernetes myself. No thanks. I instead searched for a Kubernetes distribution that could run on a desktop, which was already containerized. That’s how I landed on k0s.
There are a number of ways to run k0s, and using Docker Desktop is one of them. Going the Docker route is platform independent, and the installation instructions looked pretty straightforward. Piece of cake.
Famous last words, right?
Running k0s Locally
I would love to tell you that I tried running k0s locally on my machine before trying to run it on Nomad, but I’d be lying. I dove head-first into trying to run k0s on Nomad, creating the jobspec based on this Docker Compose from the k0s docs.
I quickly discovered that although the jobspec deployed successfully, k0s itself did not start up successfully. I should’ve known better.
Time to simplify
Too many moving parts. So I simplified things by removing Nomad from the picture, and did what I should’ve done in the the first place: run k0s locally on my machine using Docker. According to the docs, I all I needed to do was run this command:
docker run -d \
  --name k0s \
  --hostname k0s \
  --privileged \
  -v /var/lib/k0s \
  -p 6443:6443 \
  docker.io/k0sproject/k0s:latest
The good news is that the issues that I saw in Nomad were the same issues that I saw on my local machine. The bad news, of course, is that k0s did not start up successfully on my local machine.
After some digging, I found out that k0s doesn’t play nice on ARM machines, and I, of course, was running k0s on my M1 MacBook, which is an ARM machine. To fix this, I needed to pass an environment variable as part my docker run command, ETCD_UNSUPPORTED_ARCH=arm. I ended up with this:
docker run -it --rm \
  --name k0s \
  --hostname k0s \
  --privileged \
  -v /var/lib/k0s \
  -p 6443:6443 \
  -e ETCD_UNSUPPORTED_ARCH=arm \
  docker.io/k0sproject/k0s:latest
✨ NOTE: For debugging purposes, I ran k0s in interactive TTY mode (
-itflag), rather than detached mode (-dflag) so I could sift through the logs.
No dice.
Time to simplify again
Again, too many moving parts. Time to simplify again. This time, I tried to run k0s on my Intel Mac. After a bit of fiddling around, I got it running on my Intel Mac, which at least gave me hope that it would run on the M1 Mac. The resulting docker run command on my Intel Mac was this:
docker run -it --rm \
    --name k0s --hostname k0s \
    --privileged \
    --cgroupns=host -v /sys/fs/cgroup:/sys/fs/cgroup:rw \
    -v /var/lib/k0s \
    -p 6443:6443 \
    docker.io/k0sproject/k0s:latest k0s controller --enable-worker --no-taints
It turned out that I was missing a couple of flags:
--enable-worker: adds a worker node to the controller. Without this option, k0s just spins up a controller, but no worker node. Jobs are scheduled on the worker, so no worker, means you can’t actually deploy anything, which is useless to us. Check out more on Kubernetes basics here.--no-taints: By default, controller nodes running with--enable-workerare automatically tainted, so you need to pass--no-taintsto disable this behaviour. Taints prevent pods with certain attributes from being scheduled on a node.
I went back to the M1 Mac inspired and invigorated, and discovered that I committed yet another cardinal sin: I was pulling the latest k0s Docker image. The docs had latest in their example, so I figured, go with the docs, right? 🤷♀️ HA!
First off, pulling latest is an anti-pattern. Secondly, I trusted the fact that latest was giving me actual latest k0s version, 1.27.2+k0s.0, when in fact latest was pulling version v1.24.14+k0s.0 from Docker Hub. Once I pulled the right image version and added ETCD_UNSUPPORTED_ARCH=arm to my docker run command, k0s was up and running!
The resulting Docker command on my M1 Mac was this:
docker run -it --rm \
    --name k0s --hostname k0s \
    --privileged \
    --cgroupns=host -v /sys/fs/cgroup:/sys/fs/cgroup:rw \
    -v /var/lib/k0s \
    -p 6443:6443 \
    -e ETCD_UNSUPPORTED_ARCH=arm \
    docker.io/k0sproject/k0s:v1.27.2-k0s.0 k0s controller --enable-worker --no-taints
Testing the k0s deployment
To make sure everything was working, I ran a few tests.
1- Connect to the Kubernetes cluster
To do this, you need to add the cluster to your kubeconfig file.
docker exec k0s cat /var/lib/k0s/pki/admin.conf > ~/.kube/config🚨NOTE: The above command will nuke your existing kubeconfig file. If you want to merge this with an existing kubeconfig file, then try this out.
Now you can run kubectl against this cluster.
2- Make sure that the worker node was created
Run this command:
kubectl get nodes -wThis lists all of the nodes, and watches for status change. It will appear to be hanging for a bit, until node creation starts. After a while, you should see something like this:
NAME   STATUS     ROLES    AGE   VERSION
k0s    NotReady   <none>   0s    v1.27.2+k0s
k0s    NotReady   <none>   10s   v1.27.2+k0s
k0s    Ready      <none>   30s   v1.27.2+k0s
k0s    Ready      control-plane   45s   v1.27.2+k0s
You know that everything is read when you see
k0s Ready control-plane 45s v1.27.2+k0sOnce everything is up and running, hit ctrl+c, otherwise, the output will keep on going forever.
3- Check pod status
Open up a new terminal window and run this command:
kubectl get pods -A -wAgain, this watches for changes in pod state, so once everything is up and running, you should see something like this:
NAMESPACE     NAME                      READY   STATUS    RESTARTS   AGE
kube-system   coredns-878bb57ff-m4j9g   0/1     Pending   0          0s
kube-system   metrics-server-7f86dff975-d45gn   0/1     Pending   0          0s
kube-system   coredns-878bb57ff-m4j9g           0/1     Pending   0          0s
kube-system   metrics-server-7f86dff975-d45gn   0/1     Pending   0          0s
kube-system   konnectivity-agent-qzttp          0/1     Pending   0          0s
kube-system   kube-proxy-h2ngw                  0/1     Pending   0          0s
kube-system   konnectivity-agent-qzttp          0/1     Pending   0          0s
kube-system   kube-proxy-h2ngw                  0/1     Pending   0          0s
kube-system   kube-router-xlh7v                 0/1     Pending   0          0s
kube-system   kube-router-xlh7v                 0/1     Pending   0          0s
kube-system   metrics-server-7f86dff975-d45gn   0/1     Pending   0          1s
kube-system   coredns-878bb57ff-m4j9g           0/1     Pending   0          1s
kube-system   kube-router-xlh7v                 0/1     Init:0/2   0          1s
kube-system   kube-proxy-h2ngw                  0/1     ContainerCreating   0          1s
kube-system   konnectivity-agent-qzttp          0/1     ContainerCreating   0          1s
kube-system   kube-proxy-h2ngw                  1/1     Running             0          19s
kube-system   kube-router-xlh7v                 0/1     Init:1/2            0          24s
kube-system   kube-router-xlh7v                 0/1     Init:1/2            0          30s
kube-system   coredns-878bb57ff-m4j9g           0/1     Pending             0          31s
kube-system   metrics-server-7f86dff975-d45gn   0/1     Pending             0          31s
kube-system   coredns-878bb57ff-m4j9g           0/1     ContainerCreating   0          31s
kube-system   metrics-server-7f86dff975-d45gn   0/1     ContainerCreating   0          31s
kube-system   kube-router-xlh7v                 0/1     PodInitializing     0          31s
kube-system   kube-router-xlh7v                 1/1     Running             0          32s
kube-system   metrics-server-7f86dff975-d45gn   0/1     Running             0          58s
kube-system   konnectivity-agent-qzttp          1/1     Running             0          59s
kube-system   coredns-878bb57ff-m4j9g           0/1     Running             0          63s
kube-system   coredns-878bb57ff-m4j9g           1/1     Running             0          63s
kube-system   metrics-server-7f86dff975-d45gn   1/1     Running             0          81s
Once everything is up and running, hit ctrl+c, otherwise, the output will keep on going forever.
At the end of the day, you should have the following 5 pods running:
corednskonnectivitykube-proxykube-routermetrics-server
Once I was confident that k0s ran locally on my machine, it was time to once again tackle deploying it on Nomad.
k0s on Nomad
Now that I had my Docker command figured out, I could go back to my Nomad jobspec. With Luiz’s help, the final jobspec looked like this.
Let’s dig into the highlights.
Exposing the cluster port
The kubectl command connects to the cluster at https://localhost:6443, which is why we expose port 6443 in the docker run command. We’re not looking to do anything fancy, so we define it as a static port in Nomad’s network stanza (lines 6–10):
network {
  port "k0s" {
    static = 6443
  }
}
⚠️NOTE: If you’re using Hashiqube to run Nomad, you must also expose port
6443in your Vagrantfile. My fork of Hashiqube already has that set up for you.
k0s config file
The k0s jobspec uses a host volume, which points to /var/lib/k0s. A host volume is used for stateful workloads, which means that if the jobspec is nuked, you don’t lose data when your container dies. It’s the equivalent of a persistent volume in Kubernetes.
The host volume is defined in lines 12–15 of k0s.nomad:
volume "k0s" {
  type   = "host"
  source = "k0s"
}
The jobspec volume is named k0s, which means that Nomad expects a host volume definition named k0s in its config file:
client {
  ...
  host_volume "k0s" {
    path = "/opt/k0s"
    read_only = false
  }
  ...
}
To see the full a Nomad config file example, check out lines 61–64 in nomad.sh in my Hashiqube fork, or, check out lines lines 3–6 in nomad.config.hcl if you prefer to run Nomad locally on your desktop.
✨ NOTE: I’ll explain later how you can run Nomad either via Hashiqube or via desktop binary to test this example.
The k0s control plane’s config.yaml file resides in this volume, and by making it a persistent volume, we don’t lose the config file if the job is terminated.
The config.yaml definition can be found in lines 64–77 in the k0s jobspec:
template {
  data        = <<EOF
apiVersion: k0s.k0sproject.io/v1beta1
kind: ClusterConfig
metadata:
  name: k0s
spec:
  api:
    sans:
      - 192.168.0.100
# Any additional configuration goes here ...
EOF
  destination = "${NOMAD_TASK_DIR}/config.yaml"
}
When we run the k0s image, we pass the config file’s location, per line 25 of the jobspec:
task "k0s" {
  driver = "docker"

  config {
    image   = "docker.io/k0sproject/k0s:v1.27.2-k0s.0"
    command = "k0s"
    args = [
      "controller",
      "--config=${NOMAD_TASK_DIR}/config.yaml",
    ]
  }
...
}
But if you look at the code on GitHub, you may notice that the line is commented out in the jobspec definition. Which means that the Nomad job is not actually using the config file. WTF?!
The thing is that k0s can be installed without a config file. So in this jobspec, I’ve chosen to use the default config, because I don’t need to do anything fancy. If, however, you would like to use a custom config file, I’ve left the scaffolding in place for you to do so.
Privileged mode
In order to run k0s in Docker, it has to be run in privileged mode. According to the Docker docs:
“The
--privilegedflag gives all capabilities to the container, and it also lifts all the limitations enforced by thedevicecgroup controller. In other words, the container can then do almost everything that the host can do. This flag exists to allow special use-cases, like running Docker within Docker.”
When running k0s in Docker, we are essentially running Docker-in-Docker (DinD), hence the use of the --privileged flag.
We set the privileged flag in line 30 of the Docker task driver config in our jobspec:
task "k0s" {
    driver = "docker"

    config {
      image   = "docker.io/k0sproject/k0s:v1.27.2-k0s.0"
      command = "k0s"
      args = [
        "controller",
      //   "--config=${NOMAD_TASK_DIR}/config.yaml",
        "--enable-worker",
        "--no-taints",
      ]

      privileged = true
...
}
In order to be able to use the privileged flag in the Docker task driver, however, you need to enable that capability in Nomad. Do that, you must update your Nomad config as follows:
plugin "docker" {
  config {
    allow_privileged = true
  ...
  }
}
To see the full a Nomad config file example, check out line 73 in nomad.sh in my Hashiqube fork, or, check out lines line 11 in nomad.config.hcl if you prefer to run Nomad locally on your desktop.
✨ NOTE: I’ll explain later how you can run Nomad either via Hashiqube or via desktop binary to test this example.
cgroupns config
According to the k0s docs:
“If you are using Docker Desktop as the runtime, starting from 4.3.0 version it’s using cgroups v2 in the VM that runs the engine. This means you have to add some extra flags to the above command to get kubelet and containerd to properly work with cgroups v2"
It means that to run k0s in Docker, you have to add to the docker run command:
--cgroupns=host -v /sys/fs/cgroup:/sys/fs/cgroup:rwBut what’s the equivalent of doing that in Nomad?
Well, the volume part is easy. All we need to do configure a volume in the Docker task driver config in our jobspec (see line 37):
task "k0s" {
  driver = "docker"

  config {
    ...
    volumes = [
      ...
      "/sys/fs/cgroup:/sys/fs/cgroup",
    ]
  }
}
If you wanted to configure this as a mount instead of as a volume, that works too. Your code would look like this:
driver = "docker"

  config {
    ...

    mount {
      type   = "bind"
      source = "/sys/fs/cgroup"
      target = "/sys/fs/cgroup"
    }
}
And you would also need to configure your Docker plugin in the Nomad config to enable volume mounts (see lines 13–15 in nomad.config.hcl):
plugin "docker" {
  config {
    ...
    volumes {
      enabled = true
    }
  }
Adding the cgroupsns flag was a bit trickier, because there’s no such config in the Nomad Docker task driver. And if you’re using Docker Desktop as your runtime (most likely, if you’re using a Mac or Windows), without this configuration, k0s will fail to provision a node.
Uh oh…I think we’re in trouble here…🫠🫠🫠
Luckily, Luiz is a developer on the Nomad project, and was just as obsessed with getting this to work as I was, and he created a special build of Nomad that included the cgroupsns config for the Docker task driver. You can grab the binaries here. It pays to have friends at Hashicorp. 😬 And don’t worry…I’ll show you how to run all this in the next section.
🚨🚨🚨 WARNING: The above build is NOT an official Nomad build. Use at your own risk.
⚠️ Hopefully this feature will be added to the official Nomad build in the near future. 🤞I’m glad that this has at least sparked a conversation around inclusion of
cgroupns, and as a result, it has been filed officially as a PR. You can check its progress here.
Now that we have a version of Nomad that supports the cgroupns config in the Docker plugin, all we have to do is add cgroupns = "host" to the Docker task driver config in our jobspec (see line 31):
task "k0s" {
  driver = "docker"

  config {
    ...
    cgroupns   = "host"
  }
  ...
}
containerd Config
This is probably the most “not in my wheelhouse” component of this experiment. Luiz and I figured that once we had the cgroups thing sorted out, it would be easy-breezy. Not quite.
The final hurdle was this error message:
time="2023-06-19 14:32:03" level=info msg="time=\"2023-06-19T14:32:03.177330253Z\" level=error msg=\"RunPodSandbox for &PodSandboxMetadata{Name:kube-router-kstgn,Uid:6ce5964b-ac8f-4c62-b984-ba8aafdbbacd,Namespace:kube-system,Attempt:0,} failed, error\" error=\"failed to create containerd task: failed to create shim task: failed to mount rootfs component: invalid argument: unknown\"" component=containerd stream=stderr
time="2023-06-19 14:32:03" level=info msg="E0619 14:32:03.177497     117 remote_runtime.go:176] \"RunPodSandbox from runtime service failed\" err=\"rpc error: code = Unknown desc = failed to create containerd task: failed to create shim task: failed to mount rootfs component: invalid argument: unknown\"" component=kubelet stream=stderr
time="2023-06-19 14:32:03" level=info msg="E0619 14:32:03.177531     117 kuberuntime_sandbox.go:72] \"Failed to create sandbox for pod\" err=\"rpc error: code = Unknown desc = failed to create containerd task: failed to create shim task: failed to mount rootfs component: invalid argument: unknown\" pod=\"kube-system/kube-router-kstgn\"" component=kubelet stream=stderr
time="2023-06-19 14:32:03" level=info msg="E0619 14:32:03.177543     117 kuberuntime_manager.go:1122] \"CreatePodSandbox for pod failed\" err=\"rpc error: code = Unknown desc = failed to create containerd task: failed to create shim task: failed to mount rootfs component: invalid argument: unknown\" pod=\"kube-system/kube-router-kstgn\"" component=kubelet stream=stderr
time="2023-06-19 14:32:03" level=info msg="E0619 14:32:03.177580     117 pod_workers.go:1294] \"Error syncing pod, skipping\" err=\"failed to \\\"CreatePodSandbox\\\" for \\\"kube-router-kstgn_kube-system(6ce5964b-ac8f-4c62-b984-ba8aafdbbacd)\\\" with CreatePodSandboxError: \\\"Failed to create sandbox for pod \\\\\\\"kube-router-kstgn_kube-system(6ce5964b-ac8f-4c62-b984-ba8aafdbbacd)\\\\\\\": rpc error: code = Unknown desc = failed to create containerd task: failed to create shim task: failed to mount rootfs component: invalid argument: unknown\\\"\" pod=\"kube-system/kube-router-kstgn\" podUID=6ce5964b-ac8f-4c62-b984-ba8aafdbbacd" component=kubelet stream=stderr
All signs pointed to containerd.
ℹ️ASIDE: After version 1.20, Kubernetes migrated from using the Docker runtime to containerd as its container runtime.
Luiz was able to figure out that there was something funky with the containerd configuration in k0s that didn’t play nice with k0s running on Nomad.
"containerduses an overlayfs by default, and since it was running in a docker container I think it was trying to create an overlay inside an onverlay”
So he used guidance from the k0s docs to grab a copy of the containerd configuration file being used on k0s so that he could then change one config element and feed the file (with the one config change) back into k0s via the Nomad jobspec.
The config looked something like this (lines 56–348):
template {
  data        = <<EOF
  ...

    [plugins."io.containerd.grpc.v1.cri".containerd]
      default_runtime_name = "runc"
      disable_snapshot_annotations = true
      discard_unpacked_layers = false
      ignore_blockio_not_enabled_errors = false
      ignore_rdt_not_enabled_errors = false
      no_pivot = false
      # This was the only thing that needed changing. Reference: https://docs.k0sproject.io/v1.21.2+k0s.0/runtime/#containerd-configuration
      # Note from Luiz Aoqui: containerd uses an overlayfs by default, and since it was running in a docker container I think it was trying to create an overlay inside an onverlay
      snapshotter = "native"

  ...

EOF
  destination = "${NOMAD_TASK_DIR}/containerd.toml"
}
The offending line that had to be changed: snapshotter = “native” (line 149).
And then he had to make sure that the k0s pointed to the updated version of the file here (line 36):
task "k0s" {
  driver = "docker"

  config {
    ...
    volumes = [
        volumes = [
          "local/containerd.toml:/etc/k0s/containerd.toml",
        ]
    ...
  }
}
ETCD_UNSUPPORTED_ARCH=arm
What about the ETCD_UNSUPPORTED_ARCH=arm environment variable that we needed to run k0s on ARM machines? Turns out we don’t need it. I accidentally left it out of the jobspec, and it ran fine on my M1 Mac. So then I tried running k0s using Docker on my M1 without that environment variable, and it still worked. 🤷♀️
Hands on: running k0s on Nomad
Now that you understand what’s happening in the k0s jobspec, let’s run it in Nomad.
Pre-requisites
Before you try to run k0s on Nomad, you’ll need the following:
- Docker version 24.0.2 or higher
- kubectl
- Nomad a specal version of v1.5.6 (DON’T PANIC! I’ll guide you through that part.)
1- Clone the repo and run the job
First, clone the repo, and then run the above Jobspec in Nomad after cloning the repo:
git clone https://github.com/avillela/nomad-conversions.git
cd nomad-conversions
2- Run Nomad
Run Nomad on Hashiqube
If you follow my writings on Nomad, you’ll know that Hashiqube is my favourite way to run a full-fledged Hashi environment with Nomad, Vault, and Consul.
I have a fork of Hashiqube, which has all of the configurations needed to run this example.
Before you bring up Hashiqube, you’ll need to make some changes to the nomad.sh file, which is used to provision Nomad. For running k0s on Nomad, I use a special build of Nomad that includes cgroupns config for the Docker driver (as I mentioned in the earlier section). So, to run this version, you’ll need to modify a chunk between lines 154 and 159 in nomad.sh so that it looks like this:
# wget -q $LATEST_URL -O /tmp/nomad.zip
mkdir -p /usr/local/bin
# (cd /usr/local/bin && unzip /tmp/nomad.zip)
# HACK: Nomad doesn't currently have support for cgroupsns, so Luiz Aoqui created a special build for this (not an official build...yet...maybe?)
# You can download the binaries here: https://github.com/hashicorp/nomad/actions/runs/5312709136
(cd /usr/local/bin && cp /vagrant/hashiqube/bin/linux-$ARCH/nomad /usr/local/bin/nomad)
And now you can bring up Hashiqube by following the instructions here.
Run Nomad locally in Dev mode
If you don’t care for all that fanfare, then you can run this example using the Nomad binary. Since we’re using a special version of the binary that supports the cgroupsns option, you’ll need to download the binary from here first (scroll to the very bottom of the screen).
Once you’ve downloaded it, open up a new terminal window and run:
mkdir ~/k0s
cd nomad-conversions
/path/to/nomad agent -dev -config k0s/config/nomad.config.hcl
Whichever of those methods you choose to use to run Nomad, the Nomad UI will be available at http://localhost:4646.
3- Run the jobspec
Time to deploy k0s! Make sure you’re in the nomad-conversions directory.
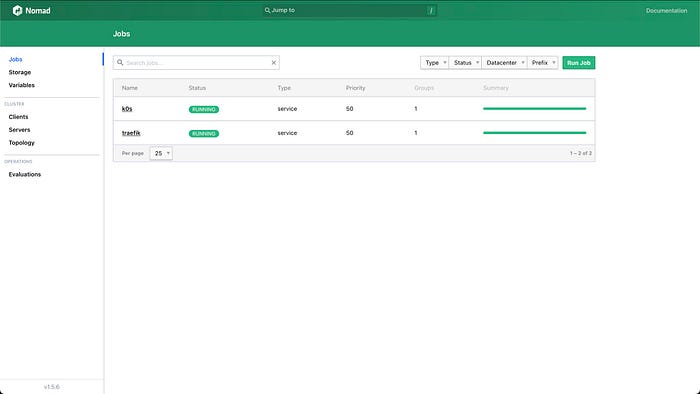
nomad job run k0s/jobspec/k0s.nomadYou should see something like this in Nomad, running on http://localhost:4646, if you’re running Nomad locally.
4- Connect to the k0s cluster on Nomad
This is slightly different compared to when we did this for k0s running locally on Docker. This time, k0s is running on Docker running on Nomad, so we need to exec into the container running k0s on Nomad. To get into the container, we need to find out its Nomad allocation. An allocation is a task that has been scheduled on Nomad. It’s kind of like a pod in Kubernetes…kind of…
export ALLOCATION_ID=$(nomad job allocs -json k0s | jq -r '.[0].ID')
nomad alloc exec $ALLOCATION_ID cat /var/lib/k0s/pki/admin.conf > ~/.kube/config
5- Make sure that the worker node was created
This is just like the what we did when we ran k0s on Docker.
kubectl get nodes -wWhen the node is ready, your final line of output should look something like this:
k0s Ready control-plane 36m v1.27.2+k0sOnce the node is Ready, hit ctrl+c.
6- Check pod status
In a separate terminal, run this:
kubectl get pods -A -wAgain, same deal as when we ran k0s locally on Docker. Eventually you should see that all 5 pods areRunning:
kube-system   coredns-878bb57ff-x2mrw           1/1     Running   0          89m
kube-system   konnectivity-agent-6szqm          1/1     Running   0          89m
kube-system   kube-proxy-rscnh                  1/1     Running   0          89m
kube-system   kube-router-swjbl                 1/1     Running   0          89m
kube-system   metrics-server-7f86dff975-pxprp   1/1     Running   0          89m
Then hit ctrl+c, otherwise the command will just continue outputting to the screen.
7- Deploy Jaeger
We can’t provision k0s and not deploy anything to it! Since I work in the Observability space it’s fitting to deploy the open source Distributed Tracing tool, Jaeger.
kubectl apply -f k0s/k8s_test/jaeger.yamlSample output:
namespace/opentelemetry created
service/jaeger-all-in-one created
service/jaeger-all-in-one-ui created
deployment.apps/jaeger-all-in-one created
Let’s make sure that the Jaeger pod was created successfully:
kubectl get pods -n opentelemetryOnce the pod is deployed successfully, you should see something like this:
NAME                                 READY   STATUS    RESTARTS   AGE
jaeger-all-in-one-5fdf486b9c-vrfpx   1/1     Running   0          49s
And now let’s make sure that we can actually access Jaeger. First, let’s enable port-forwarding on the Jaeger UI port, so we can access the UI.
kubectl port-forward -n opentelemetry svc/jaeger-all-in-one-ui 16686:16686Sample output:
Forwarding from 127.0.0.1:16686 -> 16686
Forwarding from [::1]:16686 -> 16686
Now, open up a browser window and navigate to http://localhost:16686:
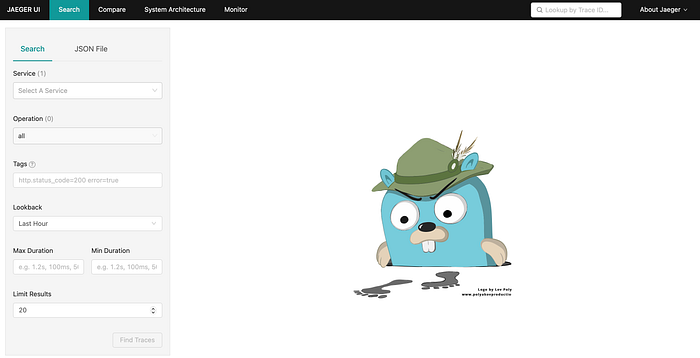
Yay! Can you believe it? We’re running Jaeger on k0s on Nomad. If you’re running Hashiqube, then Hashiqube itself is running on Docker, since it uses the Vagrant Docker provider. Which gives us a grand total of 3 levels of Docker.

✨Achievement unlocked.✨
Why run Kubernetes on Nomad?
Running Kubernetes on Nomad may seem like a fool’s errand. Realistically speaking, the only practical reason I can think of where you *might* want to run Kubernetes on Nomad is to be able to run Kubernetes Operators. Although there’s no such thing as the direct Nomad equivalent of Kubernetes Operators, it is possible to create Operators in Nomad. If you don’t want to go through the motions of doing the Kubernetes-to-Nomad translation for Operators, Kubernetes in Nomad seems like it could be a reasonable alternative. That being said, I have no idea how this would scale, and what the performance implications would be.
Final Thoughts
If you’re looking for the actual reason why I decided to run Kubernetes on Nomad, you won’t find one. My only reason is that I was curious. I wanted find out if it was possible! Curiosity opens our minds to new ideas, new possibilities, and new ways of thinking. Curiosity allows us to move forward and evolve. This little experiment taught me new things about both Nomad and Kubernetes, and allowed me to be creative. It reinforced the power of connection and collaboration, and how it’s okay to not be the smartest person in the room, because knowing what smart people to bring in to help solve a problem is just as valuable. That, my friends, is a win in my books.
Also never underestimate the power of a good collaboration. You can learn so much from them!
I will now leave you with a photo of one of my neighbourhood guinea pigs, chillin’ next to a cob of corn.

Peace, love, and code. ✌️💜👩💻